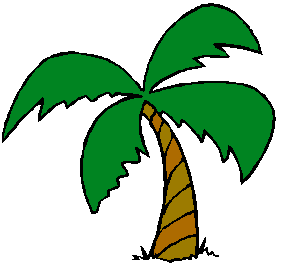

First you begin by choosing your color pallet. You can be creative with this. For your basic palm tree you need black, white, yellow, brown, and green. Which particular shades of each color is dependant upon you and for what look you are going. For instance, you can use sap green or forest green. And you can even use pink when you are adding effects of your light source.
So, then you will need to determining where is your “light source”. Meaning at which angle will the “sun” hit your tree. This will determine which side of your tree needs to be lighter to give a three-dimensional, life-like effect. For this example, let’s say your light source is to the top right. Now you will start painting the base or truck of your tree.
Base of the Tree:
You will paint a solid black line the shape and direction of your trunk being sure to leave room for the palm leaves at the top. The line’s thickness is dependant on how big your palm tree is going to be. If you are doing a large mural you will naturally need to have a thicker line, painted with a thicker brush.
Then you will come in and add a solid line of brown to the right of your existing black line making sure the colors touch but not necessarily overlap. After, you will do the same with a line of either straight white or a lighter color of the brown you are using.
Then while all of your colors are still wet, take a clean preferably dry fan brush and pull the white paint into the brown and part of the black paint being sure to leave enough of the black separate for contrast. Continue doing this from the base of the tree to the top. Note here that each time you pull your white into your darker colors you will need to get rid of the excess paint on your brush by dabbing it on a clean cloth or paper towel in order to keep your colors distinguishable and not a blob of light brown.
Palms of the Tree:
Okay, now you are ready to add your palm leaves. If you are a first time painter you may want to let your base dry completely in order that you may start over on your leaves if you mess up by simply wiping them off. If your base is dry it will not be effected when you wipe off your leaves.
You paint your leaves by taking a darker of the green you are using and draw a single line the shape and direction you want you leaves to go. Then you take a fan brush and pull your leaves from the bottom part of your existing line. The paint your use for this will naturally be darker because of your light source. And then you will pull upward from this existing line with a lighter green. Be sure both your bottom and upper leaves are going in the same direction.
For dept perception you can first make the leaves which will appear to be behind the rest in a lighter shade and work toward a gradual increase in the intensity of the color the close your get to your viewer. For the last leaves, the ones which are the closest to the viewer you can add yellow or straight white to create a more powerful contrast.
Details of the Tree:
Now you are done with your tree and if you choose can add small details which bring your tree to life. A small tip here is to take a script liner or very thin brush and use a diluted green or brown and add vines coming out from your tree. These vines can originate from the palm leaves or can wrap around the trunk. Then you can add a few sprigs of grass at the base simply base taking a green color and start at base by pressing and quickly pull the color up and release.